
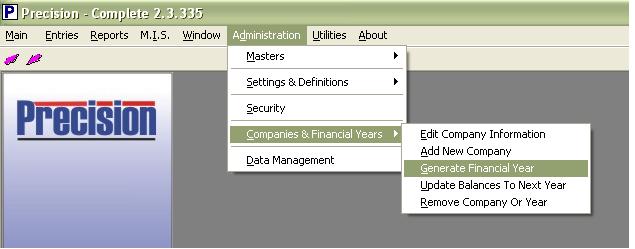
Go to menu Administration => Companies and Financial Year => Generate Financial Year
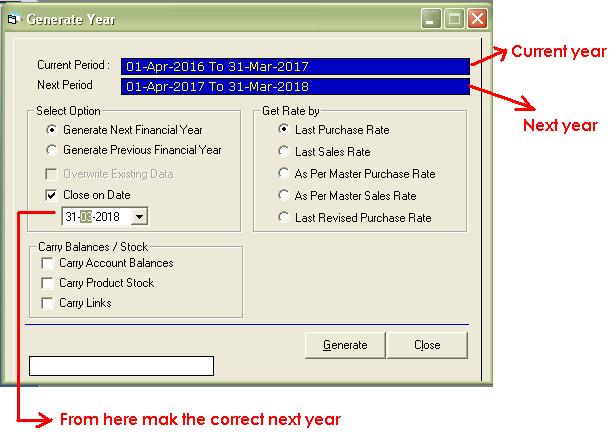
See current period and next period. Next period should be 1-4-2017 to 31-3-2018.
If it is not so then
Click on “Close on date” and enter date as 31-3-2018.
Then click on button “Generate”. Then close this window.
Select company and login to 1-4-2017 to 31-3-2018.
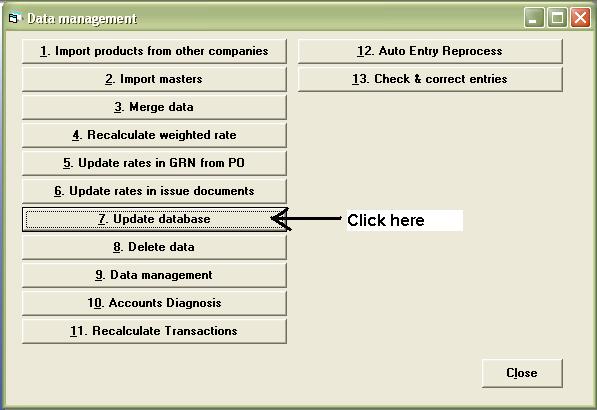
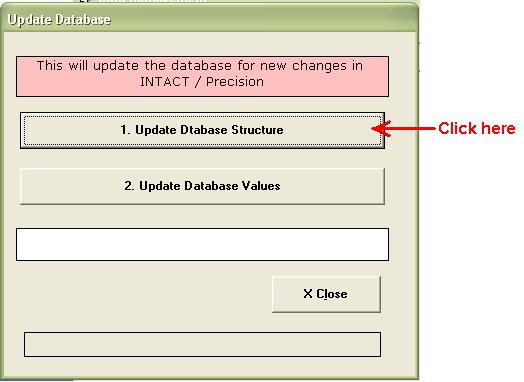
Goto Administration => Data Management => Update database => Update Database structure.

Goto Administration => Settings and Definitions => Entry form setting
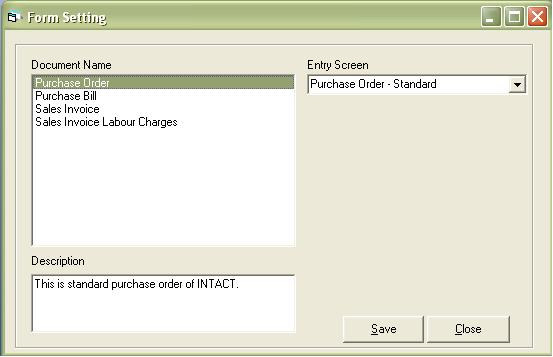
Then click on “Purchase Order” and in entry screen select “Purchase Order - Standard”. Then save
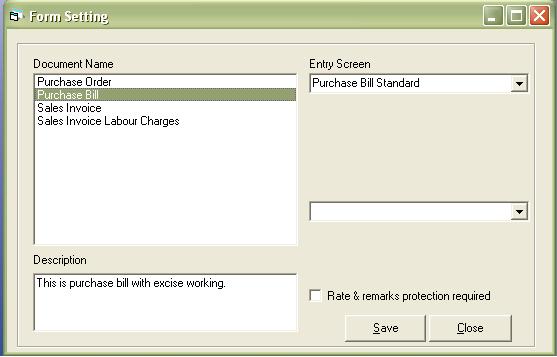
Then click on “Purchase Bill” and in entry screen select “Purchase Bill Standard”. Then save
Then click on “Sales Invoice” and in entry screen select “Sales Invoice - Telecon”. Then save.

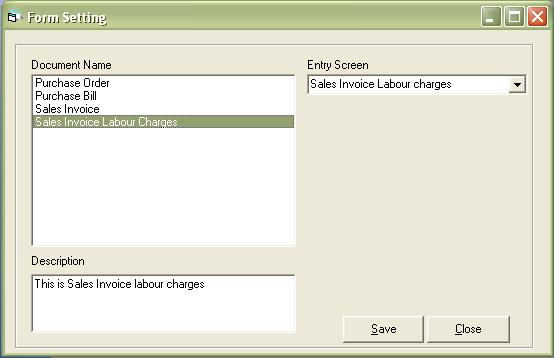
Then click on “Sales Invoice Labour Charges” and in entry screen select “Sales Invoice Labour Charges”. Then save.
If you do not want to carry product closing stock and account closing balances to next year then your work is completed, and now you can start wokring. Please note that the opening balances in new year can be either carried from last year OR you can also enter manually in new year.
Login to financial year 1-4-2016 to 31-3-2017
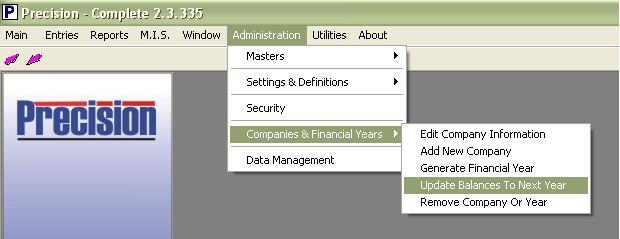
Go to menu “Administration=>Companies and Financial year=> Update Balances to Next Year"
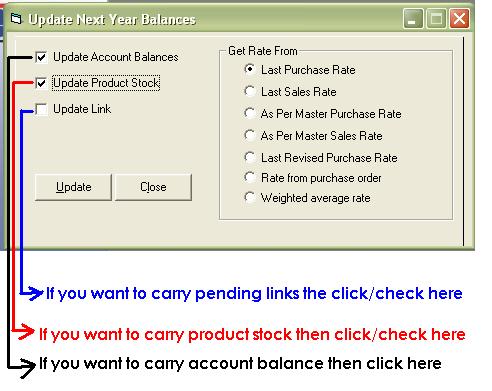
1. If Account balance is to be carried to next year then click on check box(tick mark) “Update Account balances”
2. If Product stock is to be carried to next year then click on check box(tick mark) “Update product stock”
3. If Penind links are to be carried to next year then click on check box(tick mark) "Update link"
3. Then click on button “Update”